IT-Articles (7)
Joomla LDAP Plugin - Update email address
I spent a little while searching for a way to update the Joomla user Email Address when the email address changes in Windows Active Directory. Of course, I'm using the LDAP plugin included in Joomla 3.x. The plugin can be found here. As you see, there isn't much documentation on it.
Since I couldn't find anything, I decided to edit the php file and make it work. Below is what I did.
Hope this helps someone.
1. Found the file in my Joomla site and opened it up for editing (ldap.php)
2. Went to line 150 or right after:
if (isset($userdetails[0][$ldap_email][0]))
{
$response->email = $userdetails[0][$ldap_email][0];
3. I Inserted the code:
// Grab email address, currently, in the Joomla User table
$db = JFactory::getDbo();
$query    = $db->getQuery(true)
    ->select('email')
    ->from('<<INSERT JOOMLA USER TABLE>>_users')
    ->where('username=' . "'{$credentials['username']}'");
$db->setQuery($query);
$result = $db->loadResult();

// Update Email address if it's different
$newemail = $userdetails[0][$ldap_email][0];
if ( $result == $newemail)
{
      // echo "Same";
}
else
{
     $db = JFactory::getDbo();
     $query    = $db->getQuery(true)
         ->update('<<INSERT JOOMLA USER TABLE>>_users')
         ->set("email = '{$newemail}'")
         ->where('username=' . "'{$credentials['username']}'");
      $db->setQuery($query);
      $found = (int) $db->execute();
}
4. Done. Now, when the user logs in, it checks the email address to see if it's different. If it is, it updates it. If it's not, nothing happens.
K2 Comment Notification
Today, I was messing around with the K2 Joomla Plugin. I got it working and everything was great. The only problem I found is if someone leaves a comment on an article, no one will know unless the page is visited again. I searched around and found a plugin that cost some moolah, but I didn't want to go that route. Another one I found was not available for downloading. So, away I went on a development hunt to figure out what I could do.
I ended up writing my own PHP script. It creates a new column in K2's comment table. When the script runs, it looks for 0's in the new column and sends an email with the information it finds in the record. It's not a perfect solution, but it works for me. I set it to run once a day so I'll receive all the comments, in separate emails, daily.
It's not a Joomla plugin, but it is still really easy to install. I have two .php files. One for authenticating and the other is the script. I did it this way in case someone wants to put the script in the 'public_html' folder. However, I recommend creating a folder within the Home folder so it's not accessible from the Internet and run it as a cron job.
For my example below, I'll use the folder 'K2Send'. Let's begin:
Create a folder to hold two .php files.
/home/<<user name>>/K2Send
Create two files within this folder (ex. K2Send.php and K2SendAuth.php)
Copy the following into the K2SendAuth.php file and then edit it to reflect your server and database information:
<php
// Information for K2 Send Comments
$dbserver = 'localhost';
$dbuser= 'Database User';
$dbpass = 'Database Password';
$db = 'Database';
$dbtable = "K2 comments Table";
// This is the name of the column that will be added to the K2 Comment Table.
// It can be labeled anything
$dbcolumn = "Notify";
// fromEmail = What email address it is sent from
$fromEmail = "This email address is being protected from spambots. You need JavaScript enabled to view it.";
// toEmail = What email address it is sent to
$toEmail = "This email address is being protected from spambots. You need JavaScript enabled to view it.";
// Server domain where K2 is running
$fromdomain = "mywebdomain.com";
// textEmail =0 (email is formatted HTML)
// textEmail = 1 (email is formatted Text)
$textEmail = "0";
?>
Now that you have the auth file done, open up the K2Send.php file and paste the following in it and edit the 'require_once' line to reflect the path:
<?php
/*
To Do....
1. Check if the notification column is in the K2 comments table
2. If not, create it
3. Check if column contains a 0
4. If so, send email
5. Replace the 0 with a 1
*/
//Require Authenication File
require_once "/home/---UserNAME---/K2Send/K2SendAuth.php";
$servername = $dbserver;
$username = $dbuser;
$password = $dbpass;
$dbname = $db;
$columnexist = 0;
// Create connection
$conn = new mysqli($servername, $username, $password, $dbname);
// Check connection
if ($conn->;connect_error) {
die("Connection failed: " . $conn->;connect_error);
}
// 1. Check if the notification column is in the K2 comments table
$sql = "SELECT `COLUMN_NAME` FROM `INFORMATION_SCHEMA`.`COLUMNS` WHERE `TABLE_NAME`='{$dbtable}'";
$result = $conn->;query($sql);
if ($result->num_rows > 0)
{
// output data of each row
while($row = $result->fetch_assoc())
{
if ($row["COLUMN_NAME"]==$dbcolumn)
{
echo "This column- ".$dbcolumn." - Exists!\n\n";
$columnexist=1;
}
}
if ($columnexist==0)
{
// 2. If not, create it
$add = "ALTER TABLE ".$dbtable." ADD ".$dbcolumn." INT( 11 ) NOT NULL";
$result = $conn->query($add) or die(mysqli_error($conn));
}
}
else
{
echo "0 results";
}
// 3. Check if column contains a 0
$sql = "SELECT * FROM ".$dbtable;
$result = $conn->query($sql);
if ($result->num_rows > 0) {
// output data of each row
while($row = $result->fetch_assoc()) {
/* echo "-". $row["id"]."-".$row["userName"]."-".$row["commentDate"].
"-" . $row["commentText"]. "-" . $row["commentEmail"]. "-" . $row["commentURL"]. "-" .
$row["published"]. "-" . $row[$dbcolumn]."\n\n";
*/
echo "Searching Comments Table.\n\n";
if ($row[$dbcolumn]==0)
{
// 4. If so, send email in text or HTML
// $textEmail = 0 (HTML)
echo "Found a new comment.\n\n";
if ($textEmail == 0)
{
$message = "
<html>
<head>
<title>K2 Commment</title>
</head>
<body>
<p>New K2 Comment</p>
<table>
<tr>
<th>id</th>
<th>Item</th>
<th>User</th>
<th>User Name</th>
<th>Date</th>
<th>Comment</th>
<th>User Email</th>
<th>User URL</th>
</tr>
<th>id</th>
<th>Item</th>
<th>User</th>
<th>User Name</th>
<th>Date</th>
<th>Comment</th>
<th>User Email</th>
<th>User URL</th>
</tr>
<tr>
<td>".$row["id"]."</td>
<td>".$row["itemID"]."</td>
<td>".$row["userID"]."</td>
<td>".$row["userName"]."</td>
<td>".$row["commentDate"]."</td>
<td>".$row["commentText"]."</td>
<td>".$row["commentEmail"]."</td>
<td>".$row["commentURL"]."</td>
</tr>
</table>
</body>
</html>
";
// Always set content-type when sending HTML email
$headers = "MIME-Version: 1.0" . "\r\n";
$headers .= "Content-type:text/html;charset=UTF-8" . "\r\n";
}
else
{
//Send Text Email
$message = "New K2 Comment\nID = ".$row["id"]."\n ItemID = ".$row["itemID"].
"\n UserID = ".$row["userID"]."\n User Name= ".$row["userName"]."\n Date = ".
$row["commentDate"]."\n Comment = ".$row["commentText"]."\n User Email = ".
$row["commentEmail"]."\n User URL = ".$row["commentURL"]."\n";
}
$to = $toEmail;
$subject = "K2 Comments from ".$fromdomain;
// More headers
$headers .= 'From: '.$fromEmail . "\r\n";
// $headers .= 'Cc: <<Put another EMAIL Address>>' . "\r\n";
mail($to,$subject,$message,$headers);
// 5. Replace the 0 with a 1
$sql = "UPDATE {$dbtable} SET {$dbcolumn}=1 WHERE id={$row["id"]}";
if ($conn->query($sql) === TRUE) {
echo "Record updated successfully\n\n";
} else {
echo "Error: " . $sql . "<br>" . $conn->error;
}
        }
            echo "No new comment found.\n\n";
    }
} else {
    echo "0 results";
}

$conn->close();
echo "Exiting...\n\n";
?>
Add a cron job to run the K2Send.php file as often as you like.
Post a comment if you see any errors.
Enjoy!
Fix Corrupted Windows Profile
Over the years, I've had various people that have had trouble logging into their Windows computer. Windows would login to a Temporary profile. It is an easy fix, but not so easy from a distance since it involves editing the registry. I don't like sending regedit commands to users since so many things could go wrong. In response to the many requests I received, I wrote the script below in AutoIT. It's simple and easy for the user to double-click the executable file after restarting into Safe Mode. It fixes the Corrupted Profile. The code isn't pretty, but leave a comment if you find anything that doesn't work.
If you want to learn more about the Windows Temporary Profile, search for: windows temporary profile fix
I hope this helps someone.
Thanks!
#NoTrayIcon
#RequireAdmin
#include

Opt("TrayMenuMode",3)
;$settingsitem = TrayCreateItem("Settings")
;TrayCreateItem ("")
$exititem = TrayCreateItem("Exit")
TraySetIcon("Shell32.dll",14)
TraySetToolTip("Running Fix Profile")
TraySetState()

Func CheckMenuItem()
	$msg = TrayGetMsg()
	Select
		Case $msg = $exititem
		Exit
	EndSelect
EndFunc

For $i = 1 To 50
	Local $var = RegEnumKey("HKEY_LOCAL_MACHINE\SOFTWARE\Microsoft\Windows NT\CurrentVersion\ProfileList", $i)

	CheckMenuItem()
	If @error <> 0 Then ExitLoop
	if stringright ($var,4) = ".bak" Then
		$slen = StringLen ($var)
		$new = stringleft ($var,$slen - 4)
		$copykey = "HKEY_LOCAL_MACHINE\SOFTWARE\Microsoft\Windows NT\CurrentVersion\ProfileList\" & $new
		$destkey = "HKEY_LOCAL_MACHINE\SOFTWARE\Microsoft\Windows NT\CurrentVersion\ProfileList\" & $new & ".old"
		_RegMoveKey($copykey, $destkey)
		$movesourcekey = "HKEY_LOCAL_MACHINE\SOFTWARE\Microsoft\Windows NT\CurrentVersion\ProfileList\" & $var
		$movedestkey = "HKEY_LOCAL_MACHINE\SOFTWARE\Microsoft\Windows NT\CurrentVersion\ProfileList\" & $new
		_RegMoveKey ($movesourcekey, $movedestkey)
		; Parameters.....:	$s_key	- Source key
  		; $s_val	- Source value
		;RefCount set to 0
		RegWrite ($movedestkey,"RefCount","REG_DWORD",0)
		CheckMenuItem()
		; Write Log file
		Local $file = FileOpen("fixlog.txt", 1)
  		If $file = -1 Then
			MsgBox(0, "Error", "Unable to open file.")
			Exit
		EndIf
		; Get current system time
		$tCur = _Date_Time_GetSystemTime()
		FileWrite($file, _Date_Time_SystemTimeToDateTimeStr($tCur) & @CRLF)
		FileWrite($file, "Move From: " & $copykey & @CRLF)
		FileWrite($file, "Move To: " & $destkey & @CRLF)
		FileWrite($file, "Move From: " & $movesourcekey & @CRLF)
		FileWrite($file, "Move To: " & $movedestkey & @CRLF)
		FileWrite($file, "Changed RefCount Value to 0" & @CRLF)
		FileClose($file)
		MsgBox (0,"Completed","Press OK to Exit.  Restart computer and login like normal.")
		Exit
	Else
		MsgBox (0,"Completed","Press OK to Exit.  A bad profile was not found.  Please contact the Help Desk for more troubleshooting ideas.")
		Exit
	EndIf
Next
BackupPC and Volume Shadow Copy Services (VSS)
BackupPC can be a very daunting task when first starting out, but as many people who have installed it multiple times will say, it's not that bad, but it does take some time to figure out. One of my sayings (as I may have said before), "It's easy, if you know how to do it," meaning it's not easy, if you don't. :) BackupPC is one of them, but don't fear, if you work through the issues, you'll make it. Additionally, my plan is to write my notes how I install it in a future post.
For those that get it running, the first thing they'll notice is that it doesn't copy open files. So, for those computers where the backup begins and people are working on stuff, open files are not backed up, i.e., Outlook Files or open Office documents. This bugged me because I was and I am a BackupPC fan. I scoured the internet in search of an easy way (emphasis on easy) to have BackupPC copy open files on Windows Computers. Well, in my search, I didn't find an easy one, so I went on a development spree to try and figure out a way to do it. It took a few weeks of trial and error, but I can now say, there is an easy way to do it.
Over the years, what I did grew into a hodge podge of files in a folder and a few batch files. These past few weeks, I decided to try and put them together into one interface. I wanted to use AutoIt, but the compressed executable, although doesn't have viruses, is flagged by many Antivirus programs as having one just because it was compressed by AutoIt. I didn't want to keep answering the question, "Does it contain viruses," so I opted to use Visual Basic, instead. So, below is what has been developed. From my experience, this solution runs on anything after Windows 7. I've, successfully, run this solution on Windows 7/8/10 without problems.
Additionally, I uploaded the exe's to VirusTotal.com. They have passed all virus checks. I would encourage you to do the same, if you decide to use these files. I can, personally, attest that I did not write any backdoors nor viruses in these files. These are clean and feel free to use them, if you like.
VSS BackupPC
|
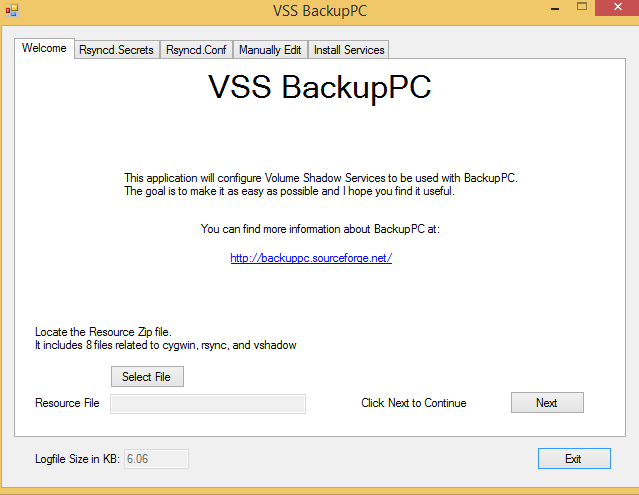
VSSBackupPC is designed to be used with the BackupPC server software. This app uses Volume Shadow Copy Services so the server can backup open files on the C:\ drive. To accomplish this, it uses Cygwin and Rsync for the data transfer. This app is written in Visual Basic and the .Net Framwork version 4.6.1 is needed to run it. If you run into any trouble, I've created a help forum to keep up with issues. |
|
| The Welcome window Select the resource zip file that is included in the download. The contents of the resource file is below. When the app is started, it creates a folder called: C:\rsyncd. This is a hard coded folder and cannot be changed. All files related to this app will be created and placed in this folder. |
 |
|
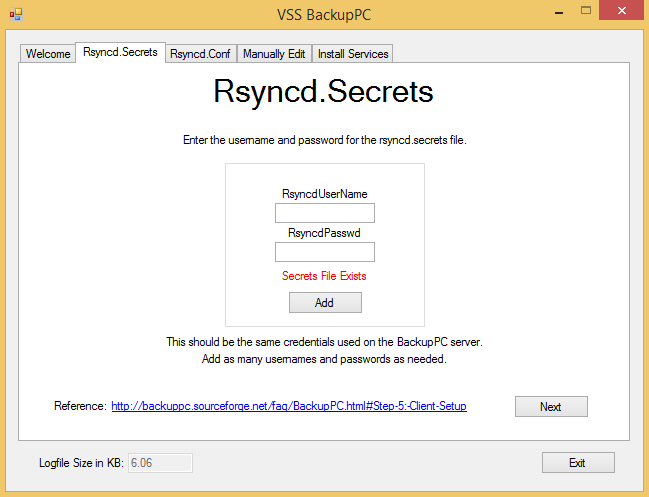
Rsyncd.secrets
|
  |
|
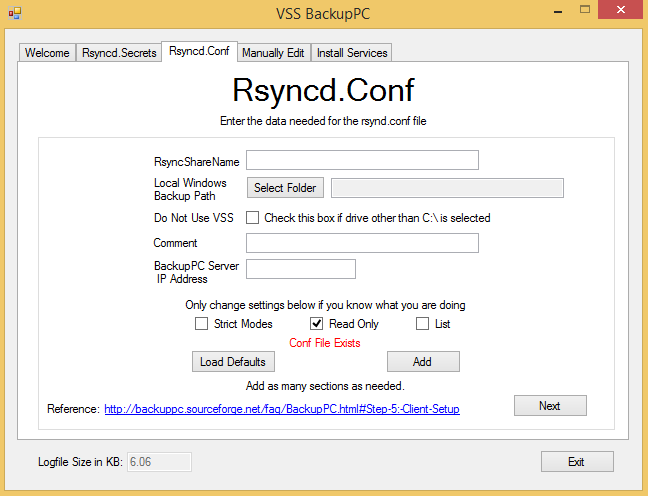
Rsyncd.Conf
|
  |
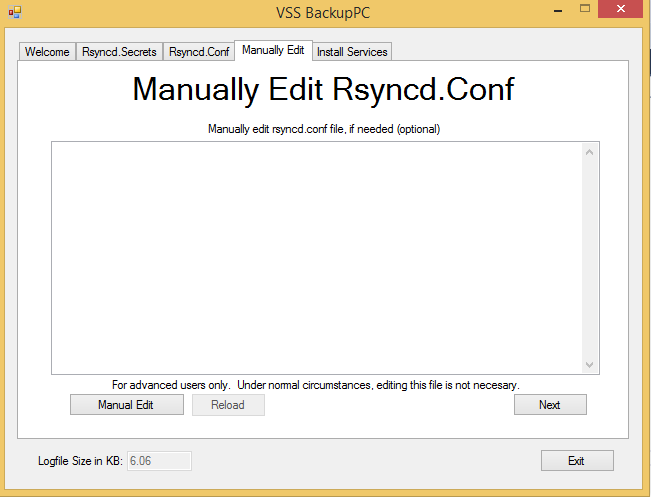
| Manually Edit Rsyncd.Conf You can manually edit the rsyncd.conf file. This is not necessary nor encouraged, but is built-in to help with advanced configurations. |
 |
|
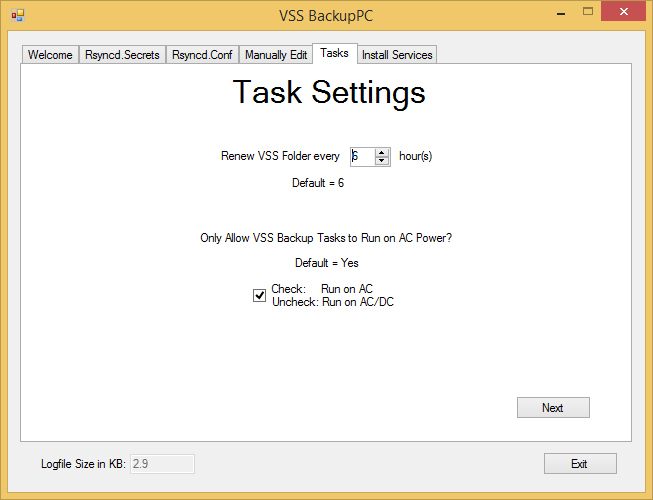
Task Settings Default = 6 hours. Set the time (in hours) that the script looks at the Time Stamp on the Shadow folder. When the time has exceeded, the Shadow Folder is removed and recreated. 2. Only Allow VSS Backup Tasks to Run on AC Power? Default = Yes. To allow the VSSBackupPC scheduled tasks to run if the laptop is running on batteries, uncheck the box. If checked, the Scheduled Tasks will only run while the computer is plugged in. (Thanks to agu for finding this setting)
|
 |
|
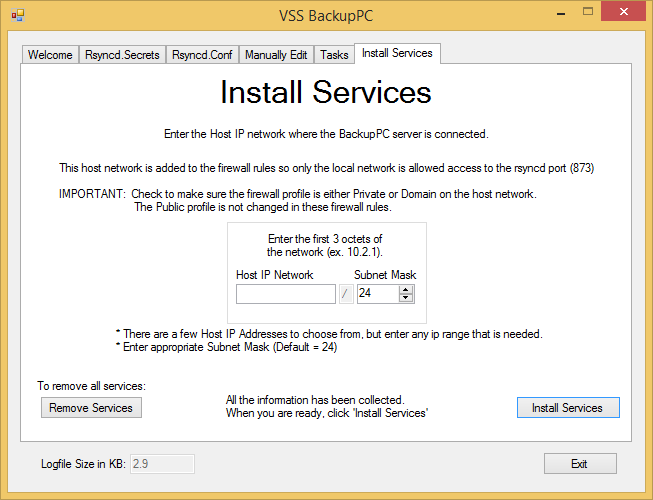
Install Services 2. Select the Subnet Mask of the Network. The default is 24 (255.255.255.0). 4. If needed, the Remove Services button will remove the services so the C:\rsyncd folder can be deleted. |
 |
| The resource zip file contains 8 files as seen to the right. The Cygwin files can be found on the internet as well as the vshadow,exe file. removevss.exe and vss-backuppc.exe were written in Visual Basic to handle the logic. All files have been uploaded and checked at VirusTotal.com. Feel free to upload them to check yourself. There are no Viruses or Backdoors written in the code. |
 |
|
There is one, additional, thing you have to do on the BackupPC server, but it's not difficult.
2. preshare.sh: Replace <Enter_Secrets_File_UserName> with the user name used above in the secrets file. sh + the path to the preshare.sh + space + $host Ex: sh /media/backup/scripts/preshare.sh $host |
1. preshare.sh:
|
|
Some notes: A VSS folder called c:\shadow is created. This is where BackupPC is directed. Additionally, the script creates a logfile called: vsslog.log and is found in the C:\rsyncd folder. When the logfile reaches 2MB, it is deleted and recreated. Post any feature requests, bugs, or issues in the help forum. https://www.underthereign.com/utrhelp/ I hope this makes sense and may even help someone down the road. As always, enjoy! |
|
|
VSSBackupPC.exe and the resource.zip file can be downloaded here: VSSBackupPC.zip |
|

CentOS and BackupPC Part 1
Installing BackupPC on CentOS
The definitive guide to installing...
or close enough
Part 1 of 3
I, recently, was able to install BackupPC on a new installation of CentOS 7 so I was able to go through my notes and put them in a coherent form. Below is what I consider 'coherent.' :) I decided to break this into 3 parts because, as I was writing, it became long. The three parts are: 1. BackupPC Installation 2. Configuration of Server 3. Adding Linux and Apple Hosts
If something doesn't make sense, please post a comment.
- I disable selinux. If this isn't something you want to do and you know how to configure BackupPC with selinux enabled, please post a note and I'll make an addition to this list.
- To disable selinux, edit the file: /etc/sysconfig/selinux
# This file controls the state of SELinux on the system. # SELINUX= can take one of these three values: # enforcing - SELinux security policy is enforced. # permissive - SELinux prints warnings instead of enforcing. # disabled - No SELinux policy is loaded. SELINUX=disabled # SELINUXTYPE= can take one of three values: # targeted - Targeted processes are protected, # minimum - Modification of targeted policy. Only selected processes are protected. # mls - Multi Level Security protection. SELINUXTYPE=targeted - Change the line that reads: SELINUX=enforcing to SELINUX=disabled
- Restart the computer
- To disable selinux, edit the file: /etc/sysconfig/selinux
- Install epel-release, backuppc, and sendmail, if not already installed
yum install epel-release
yum install backuppc sendmail
- Add a BackupPC Admin user
- From root, type: htpasswd /etc/BackupPC/apache.users <<admin username>>
- Example: # htpasswd /etc/BackupPC/apache.users bpcadmin
- When prompted, enter a password of your choice, twice
# htpasswd /etc/BackupPC/apache.users bpcadmin New password: Re-type new password: Adding password for user bpcadmin - If you already know which users that will need access to BackupPC, you can add users this same way now or come back at a later time
- From root, type: htpasswd /etc/BackupPC/apache.users <<admin username>>
- With the Backup Drive mounted, create the folders, and change the permissions to allow the backuppc user access
# mkdir /media/backups/BackupPC
# mkdir /media/backups/BackupPC/pc
# mkdir /media/backups/BackupPC/cpool
# chown -R backuppc /media/backups/BackupPC/
- Edit the BackupPC config file: /etc/BackupPC/config.pl
- Around line 300, look for: $Conf{TopDir} and add the path where the backups will be stored.
$Conf{TopDir} = '/media/backups/BackupPC/'; $Conf{ConfDir} = '/etc/BackupPC/'; $Conf{LogDir} = '/var/log/BackupPC'; $Conf{InstallDir} = '/usr/share/BackupPC'; $Conf{CgiDir} = '/usr/share/BackupPC/sbin/'; - In the same file, scroll down further, around line 2030, and look for: $Conf{CgiAdminUsers}
- Add the Admin user created above. This gives the Admin access to make changes via the Web Gui
$Conf{CgiAdminUserGroup} = ''; $Conf{CgiAdminUsers} = 'bpcadmin'; - Save the file
- Around line 300, look for: $Conf{TopDir} and add the path where the backups will be stored.
- Give the backuppc user permission to run anywhere on server
- Run command as root: visudo
- Look for "Allow root to run any commands anywhere"
- Below the line: root ALL=(ALL) ALL
- Add: backuppc ALL=NOPASSWD: ALL
## Allow root to run any commands anywhere root ALL=(ALL) ALL backuppc ALL=NOPASSWD: ALL - Save file
- Start the BackupPC service
# systemctl start backuppc.service- Helpful tip: If the service fails, run the following as root to view the errors
# sudo -u backuppc /usr/share/BackupPC/bin/BackupPC -d
- Helpful tip: If the service fails, run the following as root to view the errors
- If Successful, log in to website with Admin user
- http://localhost/BackupPC
- Helpful tip: The word, BackupPC, is case sensitive
- http://localhost/BackupPC
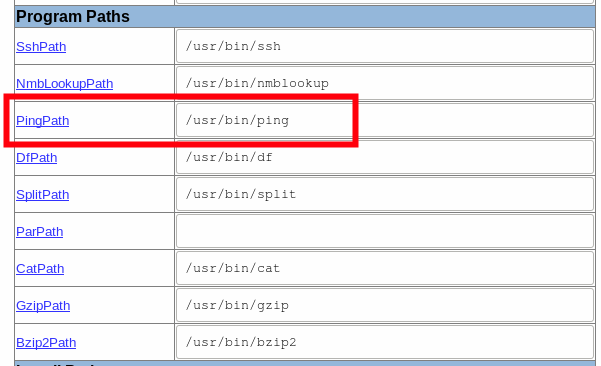
- Click 'Edit Config' and check the PingPath setting
- If blank, change it to: /usr/bin/ping
- If blank, change it to: /usr/bin/ping
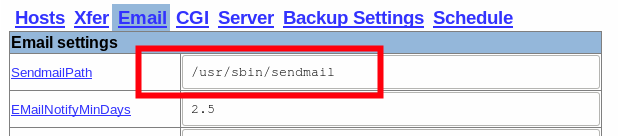
- Click 'Email' and check the SendmailPath setting
- If blank, change it to /usr/sbin/sendmail
Jump over to Part 2 and continue...
CentOS and BackupPC Part 2
Installing BackupPC on CentOS
The definitive guide to installing...
or close enough.
Part 2 of 3
This is part 2 of a 3-part article. If you haven't seen the other parts, you can find them here: Part 1 and Part 3.
Part 2 goes through configuring the BackupPC Server. If something doesn't make sense, please leave a comment.
- If you are interested in accessing BackupPC from another computer on the network, edit the Firewall with your tool of choice and allow port 80 through it
- Additionally, you will need to edit the apache BackupPC configuration file
- Edit: /etc/httpd/conf.d/BackupPC.conf
- Add the two lines below containing the IP address of the local network that needs access. Add identical lines below them, as needed, for any other network that needs web access to the server.
	<IfModule mod_authz_core.c>
	  # Apache 2.4
	  <RequireAll>
	    Require valid-user
	    <RequireAny>
	      Require local
              Require ip 192.168.1  # Add this line
	    </RequireAny>
	  </RequireAll>
	</IfModule>
	<IfModule !mod_authz_core.c>
	  # Apache 2.2
	allow from 127.0.0.1
        allow from 192.168.1  # Add this line
	require valid-user
	</IfModule>
- Sometimes, I have run into trouble where the temporary folder doesn't exist, gets deleted, or otherwise, disappears, so I wrote a startup script to check it and create it, if not found. This is optional, but is something I do, just in case.
- First, create a file. I'll put this one in the root folder and call it backuppccheck.sh:
# vi /root/backuppccheck.sh - Paste the following in the file:
#!/bin/sh # backuppccheck # description: Makes sure the backuppc Temp Folder Exist on startup if [ -d /var/run/BackupPC ]; then logger "BackupPC temp folder exists" else mkdir -p /var/run/BackupPC chown backuppc:backuppc /var/run/BackupPC logger "BackupPC temp folder created" fi - This will check if the folder exists and create it, if needed. Either way, it will write a note to the logfile what it does.
- Make the file executable:
# chmod u=rwx /root/backuppccheck.sh - Make the service file that will execute this file on startup:
# vi /etc/systemd/system/backuppccheck.service - Paste the following in the file, changing the file name and location as needed:
[Unit] Description=Check if BackupPC Temp Folder Exists on startup After=network.target [Service] Type=simple ExecStart=/root/backuppccheck.sh TimeoutStartSec=0 [Install] WantedBy=default.target - Start and Enable the service:
#  systemctl start backuppccheck.service
#  systemctl enable backuppccheck.service
- First, create a file. I'll put this one in the root folder and call it backuppccheck.sh:
To have the BackupPC server find and ping other computers, you'll need to configure the Router and/or the BackupPC Server
- Depending on how you're network is configured, you may have to tell the router AND the backuppc server where to find computers on the network that you want to back up. To do this, you need to assign static IP addresses in the router configuration. For example, I want to back up the following workstations and I'm assigning the corresponding IP addresses. Each router is different, but search the internet how to do this for your specific router, if needed.
- MY EXAMPLE:
- MyPCLaptop is assigned 192.168.1.50
- MyLinuxLaptop is assigned 192.168.1.55
- MyMacLaptop is assigned 192.168.1.60
- MyDesktop is assigned 192.168.1.70
- MY EXAMPLE:
- Once you have these IP addresses entered in the router, go to the BackupPC server and find the hosts file.
- In CentOS, it is located in the following file: /etc/hosts
- Edit the Hosts file and add the same IP addresses and Hostnames as you did in the Router
# vi /etc/hosts - Add the same hostnames and IP addresses
127.0.0.1 localhost ::1 localhost 192.168.1.50 MyPCLaptop 192.168.1.55 MyLinuxLaptop 192.168.1.60 MyMacLaptop 192.168.1.70 MyDesktop - After adding these to the BackupPC server, you should be able to PING these computers. For fun, you can ping as the backuppc user.
- As root, type:
# sudo -u backuppc ping MyPCLaptop
- Sending test Email
- As root, type:
-
# sudo -u backuppc /usr/share/BackupPC/bin/BackupPC_sendEmail -u This email address is being protected from spambots. You need JavaScript enabled to view it. - If the email doesn't send, you should be able to see the errors and/or troubleshoot the problem. There are many resources on the internet to help with sendmail.
- As root, type:
One, last, optional, thing you can do on the Server:
Encrypt the BackupPC Data
This is a little advanced and I won't go into great detail on how to encrypt a drive as there is plenty of CentOS information to be found, but once the drive is formatted and encrypted, mount the drive where you want BackupPC to store the data and configure the drive as shown in Part 1. So, for example, if I have an encrypted drive mounted at /media/encBackup, I run through all the parts and get BackupPC working. Since the whole point of the encryption is to keep it secure, the encrypted drive is not automatically mounted at startup so, if the computer is restarted, you will have to manually mount the drive and start the backuppc services.
With the script below, the only thing you'll do when the computer is restarted is (1) login as root, (2) run the script, (3) type the password to unlock the drive.
I put the script in the /root folder so when I login as root, all I have to do is run the script, but you can put it anywhere. It's really easy. First, we need to get the encrypted drive information.
- Unlock the Encrypted Drive and, from root, type:
blkid - Locate the Encrypted Drive's:
- Device Name (ex. /dev/sdb)
- UUID (ex. fc3333f1-1bf3-3333-af33-333a333f33af)
- Device Name after being unlocked (ex. /dev/mapper/fc3333f1-1bf3-3333-af33-333a333f33af)
[root@localhost ~]# blkid
...
/dev/sdb: UUID="fc3333f1-1bf3-3333-af33-333a333f33af" TYPE="crypto_LUKS"
...
/dev/mapper/fc3333f1-1bf3-3333-af33-333a333f33af: LABEL="Backups" UUID="fc8888f1-1bf8-8888-af88-888a888f88af" TYPE="ext4"
- Once the above information has been determined, create a file...I'll call mine: start_backuppc.sh
# vi /root/start_backuppc.sh - Paste the following information in the file and replace the Device and UUID information with your Encrypted drive information.
#!/bin/bash # Device Name of locked drive and UUID cryptsetup luksOpen /dev/sdb "fc3333f1-1bf3-3333-af33-333a333f33af" # Mount encrypted drive after unlocking it # mount /dev/mapper/UUID /mount/point mount /dev/mapper/fc3333f1-1bf3-3333-af33-333a333f33af /media/encBackup #Restart BackupPC service systemctl restart backuppc.service - Save the file and make it executable
# chmod -u=rwx /root/start_backuppc.sh - Now, once the computer has been restarted, login as root and type:
# sh start_backuppc.sh - Type the Encrypted Drive's Password and logout. If there were no errors, BackupPC starts.
Congrats! You should have a working BackupPC server...whether it is encrypted or not. To add different hosts, jump to Part 3
CentOS and BackupPC Part 3
Installing BackupPC on CentOS
The definitive guide to installing...
or close enough
Part 3 of 3
This is part 3 of a 3-part article. If you haven't seen the other parts, you can find them here: Part 1 and Part 2.
Part 3 goes through configuring Linux and Apple Hosts. For Windows PC Hosts, see BackupPC and Volume Shadow Services
There are three sections below
- BackupPC Server SSH Configuration
- BackupPC Server and Linux Workstations
- Apple MacOSX
I use SSH and rsync for Linux and Apple Host because the software is standard on the OS's, it's secure, and it's easy to configure.
BackupPC Server SSH Configuration
To get started, we need to create the SSH Keys for the backuppc user
List the folder
# ls /var/lib/BackupPC/.sshIf it doesn't exist, run the following command as root
# sudo -u backuppc ssh-keygen -t rsa -C "backuppc"Press 'Enter' after each line to create keys with no password
Enter file in which to save the key (/var/lib/BackupPC/.ssh/id_rsa): <<Enter>>
Enter passphrase (empty for no passphrase):  <<Enter>>
Enter same passphrase again:  <<Enter>>
Public key is saved in: /var/lib/BackupPC/.ssh/id_rsa.pub
This creates the Public and Private key for the backuppc user
BackupPC Server and Linux Workstations
For BackupPC to backup the Linux Server or another Linux Workstation, the backuppc user must login remotely without a password. We can accomplish this by copying the backuppc user's public key to the root user
First, we need to verify that the local root account has SSH configured
# ls /root/.sshIf this folder doesn't exist, run the following command from root to create the folder and keys
# ssh-keygen -t rsa -C "root"
Additionally, open the SSH config file
# vi /etc/ssh/ssh_configVerify the following two lines are commented with '#'
# StrictHostKeyChecking no
# PasswordAuthentication no
If the SSH config file is changed, restart the service
# systemctl restart sshdNow, copy the backuppc users public key to the local root account
- For the BackupPC Server, use localhost or the Server host name
# sudo -u backuppc ssh-copy-id root@localhost - Enter root password
- For the Linux Workstation, use the computer name (ex. MyLinuxLaptop)
# sudo -u backuppc ssh-copy-id root@MyLinuxLaptop- Enter root password
After the command above, successfully, completes, the following command should connect without password
For the BackupPC Server use localhost or the Server host name
# sudo -u backuppc /usr/bin/ssh root@localhostFor the Linux Workstation, use the computer name (ex. MyLinuxLaptop)
# sudo -u backuppc /usr/bin/ssh root@MyLinuxLaptopIf the following error is seen in the logs when performing a backup: Unable to read 4 bytes?
Run the ssh-copy-id command again and verify the backuppc user can login with no password
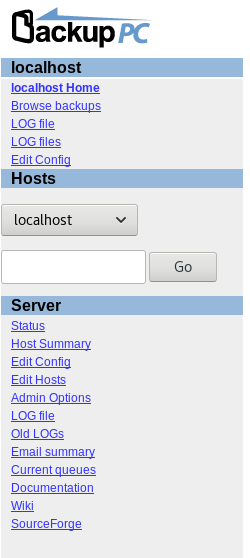
Once you can connect without a password, go to BackupPC Configuration Page (ex. http://localhost/BackupPC)
Click 'Edit Host' and 'Add'
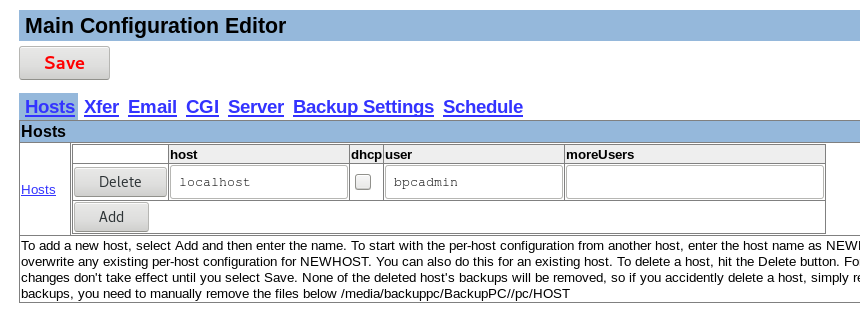
Enter Host:
For the BackupPC Server, use localhost or the Server host name
For the Linux Workstation, use the computer name (ex. MyLinuxLaptop)
Enter User:
This user can be the Admin or a regular user. If this is a regular user and you want this user to access his/her own backups, then add a password using htpasswd as shown in Part 1
Click 'Save' and then click another link (ex. Host Summary) or refresh the page. Once the page is refreshed, you will see the host name listed in the Host Drop Down list.
Select the Linux Hostname (localhost or MyLinxLaptop) and click 'Edit Config' in the Host Name Section, not the Server Section
Click 'Xfer'
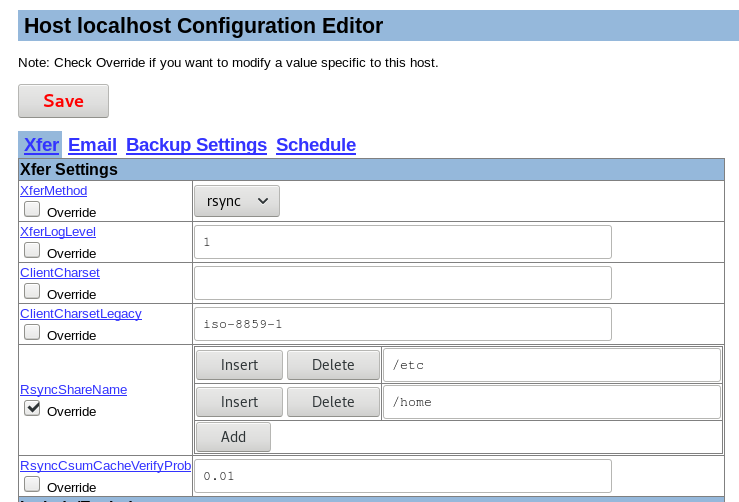
Change the XferMethod to rsync
Change the RsyncShareName to reflect folders to backup
- Example: /etc and /home
This is all I do to connect Linux computers, but configure other settings as needed, i.e., Email, Backup Settings, and Schedule
Apple MacOSX
Backing up Apple computers is much the same thing, just have to go about it a different way.
First, we need to allow remote connections
Open System Preferences -> Sharing
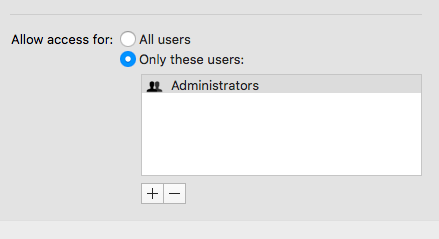
Check 'Remote Login'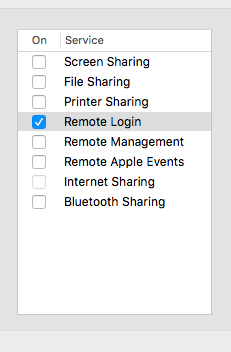
Check 'Only these users:' and select 'Administrators'
If only one user account is needed to be backed up, skip Enable Root User section
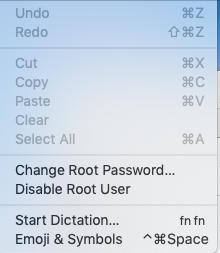
Enable Root User
If needing to backup multiple user accounts or folders outside a user folder, you will need to enable the Root User.
Choose Apple menu > System Preferences, then click Users & Groups (or Accounts).
Click lock icon, then enter an administrator name and password.

Click Login Options.
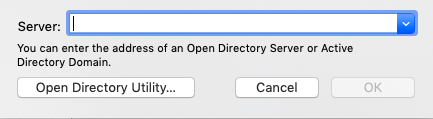
Click Join (or Edit).
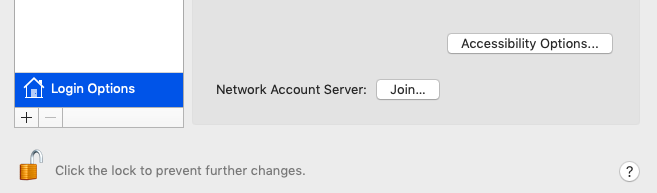
Click Open Directory Utility.
Click lock icon in the Directory Utility window, then enter an administrator name and password.
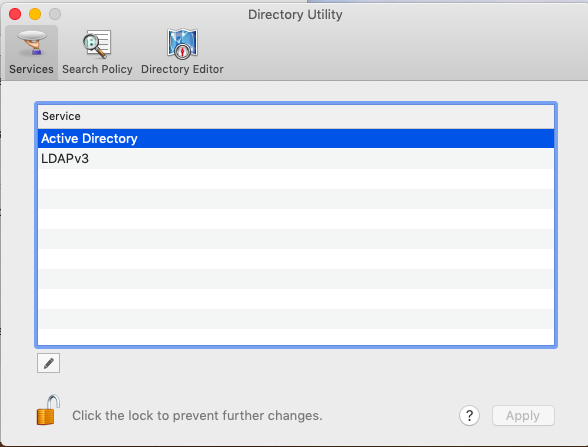
From the menu bar in Directory Utility:
Choose Edit > Enable Root User, then enter the password that you want to use for the root user.
Or choose Edit > Disable Root User.
Reference: https://support.apple.com/en-us/HT204012
Copy backuppc public key to user account
- If root user is enabled:
# sudo -u backuppc ssh-copy-id root@MyMacLaptop - If root user is not enabled (change AppleUser to reflect the user account needing to be backed up):
# sudo -u backuppc ssh-copy-id AppleUser@MyMacLaptop
Verify that you can login from the BackupPC server without a password:
- If root user is enabled:
# sudo -u backuppc ssh root@MyMacLaptop - If root user is not enabled (change AppleUser to reflect the user account needing to be backed up):
# sudo -u backuppc ssh AppleUser@MyMacLaptop
The backuppc Server should be able to ssh into the remote computer without a password
If the following error is seen in the logs when performing a backup: Unable to read 4 bytes?
Run the ssh-copy-id command again and verify the backuppc user can login with no password
Once you can connect to the remote computer without a password, go to BackupPC Configuration Page (ex. http://localhost/BackupPC)
Click 'Edit Host' and 'Add'
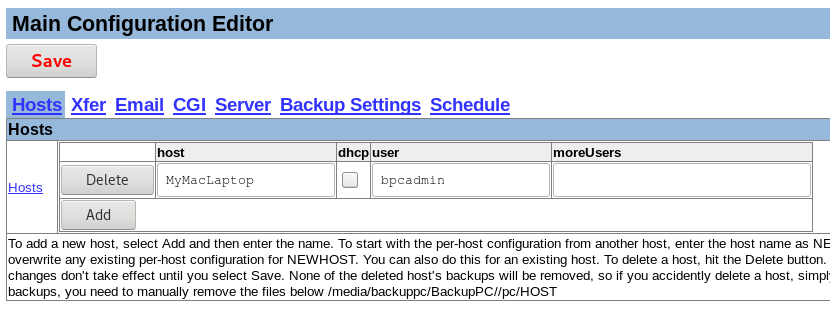
Enter Host:
For the Apple Computer, use the computer name (ex. MyMacLaptop)
Enter User:
This user can be the Admin or a regular user. If this is a regular user and you want this user to access his/her own backups, then add a password using htpasswd as shown in Part 1
Click 'Save' and then click another link (ex. Host Summary) or refresh the page. Once the page is refreshed, you will see the host name listed in the Host Drop Down list.
Select the Apple Computer Hostname (MyMacLaptop) and click 'Edit Config' in the Host Name Section, not the Server Section
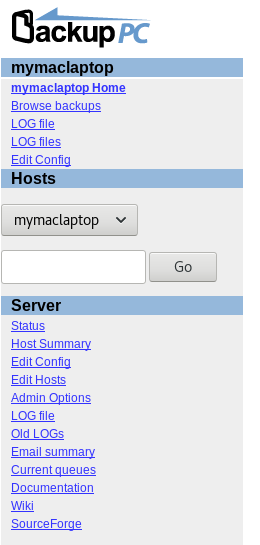
Click 'Xfer'
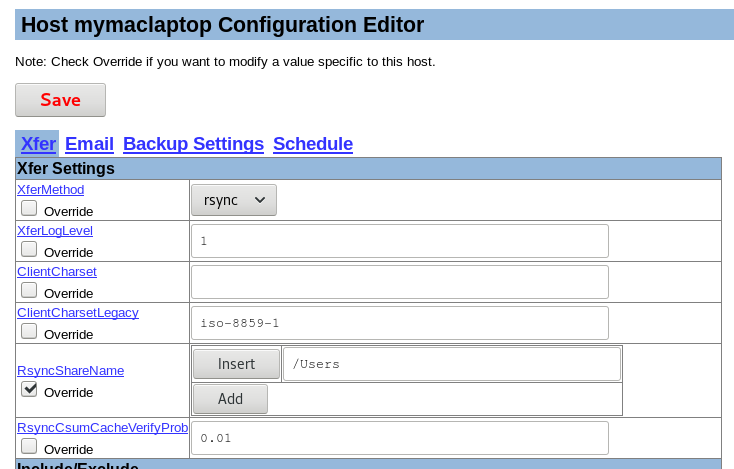
Change the XferMethod to rsync
Change the RsyncShareName to reflect folders to backup
- If root user is enabled, backup multiple user accounts:
- RsyncShareName = /Users
- If root user is not enabled, backup one user account:
- RsyncShareName = /Users/AppleUserAccount
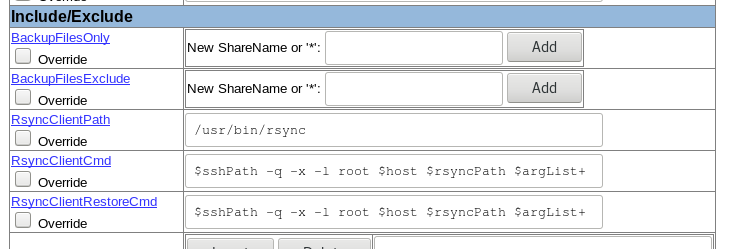
For RsyncClientCmd and RsyncClientRestoreCmd, change the user, if root is not enable
- If root user is enabled:
- $sshPath -q -x -l root $host $rsyncPath $argList+
- If root user is not enabled:
- $sshPath -q -x -l AppleUserAccount $host $rsyncPath $argList+
This is all I do to connect Apple computers, but configure other settings as needed, i.e., Email, Backup Settings, and Schedule
If something needs to be corrected or doesn't make sense, leave a comment.
As always, Enjoy!